|
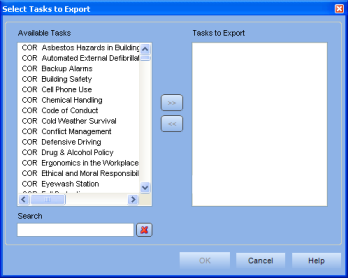
Select Tools > Batch Processing > Export Tasks. The Select Tasks to Export dialog appears.

Click on a task you want to export under
the Available Tasks list and then click the >>
button.
The task appears in the Tasks to Export list. Continue to add as many
tasks as needed.
Use
these tips to add multiple tasks at a time:
- Select a range of tasks by holding down <Shift> and left-clicking
on the first task you want to export. While still holding <Shift>,
scroll down and click on the last task you want to include.
- Select multiple tasks in different places in the list by holding down
<Ctrl> and left-clicking on the tasks you want to include. Deselect
a task by clicking on it again (while holding <Ctrl>).
- Select the entire task list by clicking anywhere in the Available Tasks list and then pressing <Ctrl + A> on your keyboard.
(Optional) Refine the tasks list by typing in letters or words in the Search field. Click the "X" button to clear the search field.
Click OK. A file save dialog appears.
Choose a place to save your export file, and type in a file name (or use the default name). If a file with this name already exists, you'll be asked to overwrite it.
Click Save.
Your export file is now saved as a BIN file and is ready to be imported.
Additional Help:
Interpret Task Export/Import (Detailed help on exporting tasks)