|
An Activity Report Template is created through the template creation wizard, which includes a number of criteria pages used to define what information you want to include or exclude in your report. These criteria pages are explained in full detail below. An Operational Administrator, a System Owner, or a Supervisor (with permission) can create an Activity Report. (To view a generated Activity Report, visit Interpret Activity Report.)
Note about Supervisors creating Activity Reports: Even if a Supervisor has been given permission to create Activity Reports, they will not see the creation wizard in the same way an Operational Administrator or System Owner would. The first tab in a Supervisor's view is Org Units; however, if a template created by a Supervisor is edited by an Administrator or System Owner to report on all activities, then the Activity Scope tab will be visible. Also, any templates that are shared by an Administrator or System Owner with a Supervisor will also display the Activity Scope tab.
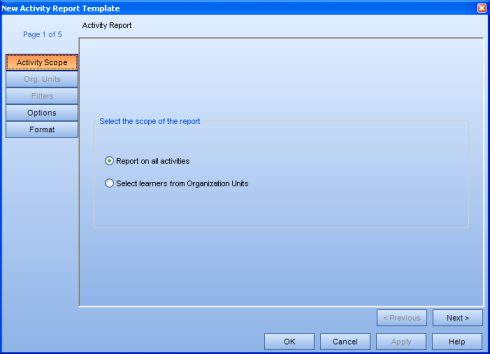
There are two options:
Report on all activities - Choose this option to run the report for all activities and on all people. When you choose this option the Org Units and Filters pages are grayed out and clicking Next > takes you to the Options page.
Select learners from Organization Units - Choose this option to restrict the report by selecting people from Org Units. Clicking Next > takes you to the Org Units page.

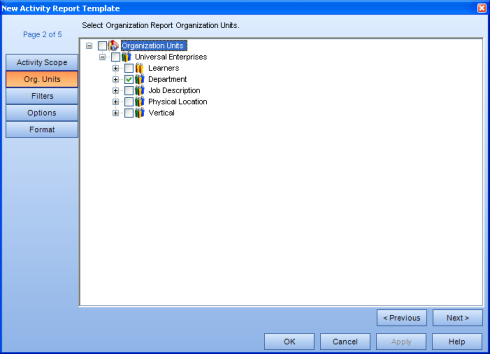
Choose any number of Org Units or individual Learners to include in the report by expanding the tree and clicking in the checkboxes. Click Next > to move on to the Filters page. (The Org Units page will only appear if "Select learners from Organization Units" was selected from the Activity Scope page.)
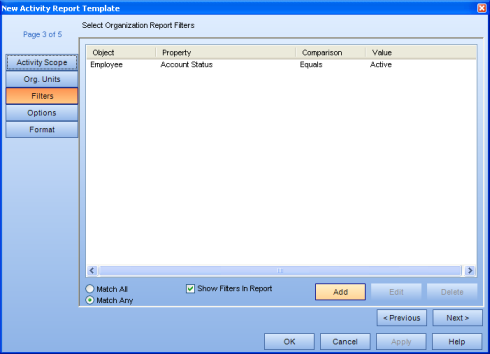
This page allows you to refine your results. Click Add and choose your filters from the dropdown menus, then click OK. You can add as many filters as you want. (The Filters page will only appear if "Select Learners from Organization Units" was selected from the Activity Scope page.)
For more information on using Filters, see Report Filters.
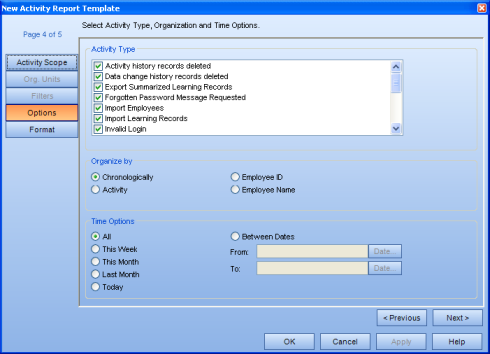
There are three options:
Activity type - Select all desired Activity Types.
Organize by - Select how to organize the results.
Time Options - Select the Time Options for the report.
Please note: If selecting specific dates, the "From" date must occur before the "To" date to display any results.
Click Next > to move on to the Format page.
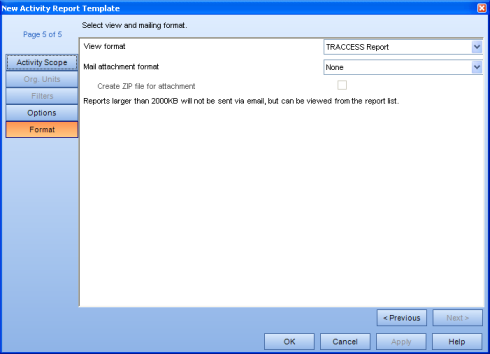
This page allows you to choose your view and mailing format.
View format - Select the view format. This is the format that the report will be displayed within the TRACCESS application. The possible formats are: TRACCESS Report, Microsoft Excel, Microsoft Excel Data Only, Adobe Acrobat PDF, and Microsoft Word Document.
Mail attachment format - Select the mail attachment format. This is the format that the report will be generated in to be sent to your email inbox. The possible formats are TRACCESS Report, Microsoft Excel, Microsoft Excel Data Only, Adobe Acrobat PDF, and Microsoft Word Document.
Create ZIP file for attachment - Select whether or not to zip the mail attachment.
Please note: This will decrease the overall file size allowing you to generate and receive larger reports; however, you may wish to check whether or not attachments with a *.zip extension are currently being blocked by your email system before checking this option.
If the generated report is larger than the value shown in this dialog, you will receive a message indicating the completion status of the report, and that it was unable to include the attachment due to its size. In this case, you can still view the report within TRACCESS, and subsequently export it.
Additional Help: