|
|
|
|
Task Export/Import allows you to perform two main functions:
Duplicate tasks within a system.
Copy tasks from one system to another.
Note: When tasks are duplicated within a system, the task (including the test, capability, and assessment) are also copied. Resources remain linked to their tasks. When imported to a new system, however, the resources are duplicated.
These two functions are achieved by first creating an export file then imported that file into the system.
Whether you want to copy tasks from one system to another or duplicate tasks within a system, you first need to create an export file. An export file is actually a BIN file, which is a ZIP file containing individual task files and an XML document matching the task file names to original task names.
Note: The BIN file cannot be edited outside of the TRACCESS application.
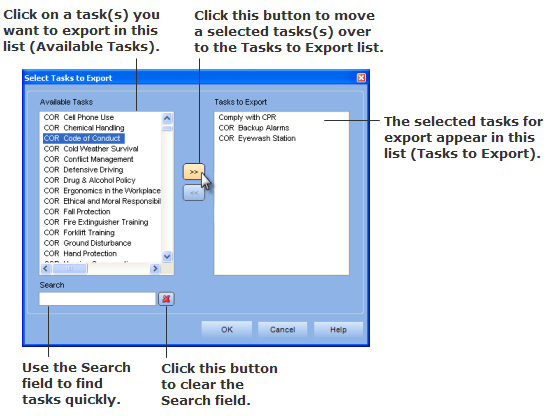
The Export file is created by selecting Maintenance > Batch Processing > Export Tasks. A dialog appears with a list of all the available tasks in your system—these appear on the left under Available Tasks. Clicking on a task in this list and then clicking the >> button moves the task to the Tasks to Export list on the right. Any tasks in this list will become a part of your export BIN file.
You may have multiple tasks to add to the export list—perhaps even hundreds or thousands. There are a few simple ways to add many tasks quickly to the Tasks to Export list.
Select a range of tasks: Hold down <Shift>, and click on the first task you want to include. While still holding <Shift>, scroll down the list (if needed) and click on the last task you want to include.
Select multiple tasks in different places: Hold down <Ctrl>, and click on each task you want to include. Continue to hold <Ctrl> and scroll down the list while selecting tasks. To deselect a task, click on the selected task again (while holding <Ctrl>).
Select all the tasks: Click anywhere in the Available Tasks list, then press <Ctrl + A> on your keyboard. All tasks in the list will be selected. To deselect all tasks, click in the list again.
The image below explains the Select Tasks to Export dialog in detail.
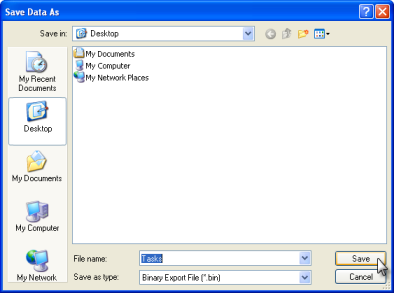
When you have added all the tasks you want to export to the Tasks to Export list, click OK. A save dialog appears, like the one shown below. Choose where to save the file, and type in a file name (or use the default name). Click Save. Your export BIN file is now ready to be imported.
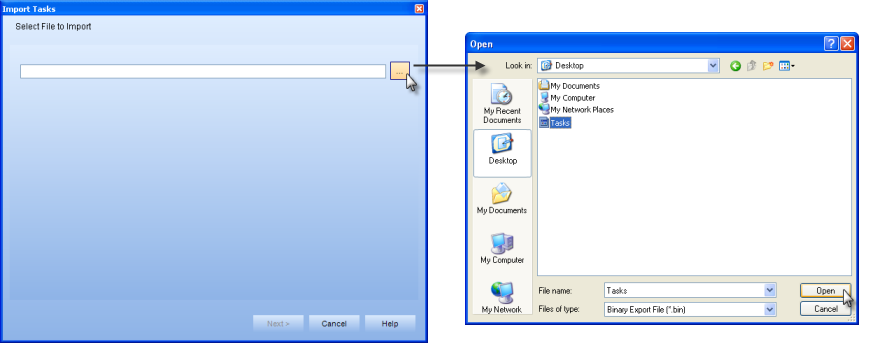
Once you have an export BIN file, you can import new tasks into a system or copy tasks into a system. The file is imported by selecting Maintenance > Batch Processing > Import Tasks. The Import Tasks Wizard is launched.
The first page, Select File to Import, requires you to select the BIN file by clicking on the ellipsis (...) button. This opens a browse dialog that allows you to choose the BIN file. Once the BIN file path is indicated, click the Next > button.
The Select Tasks to Import page works just like the Export Tasks dialog, except you are selecting files to import, rather than to export. Click on a task in the Tasks in File list and click the >> button to add it to the Tasks to Import list. To remove a task from the import list, click on it and then click the << button. To select multiple tasks at a time, refer to the instructions above under Exporting Tasks.
Once you have all the tasks you want to import in the Tasks to Import list, click Next >.

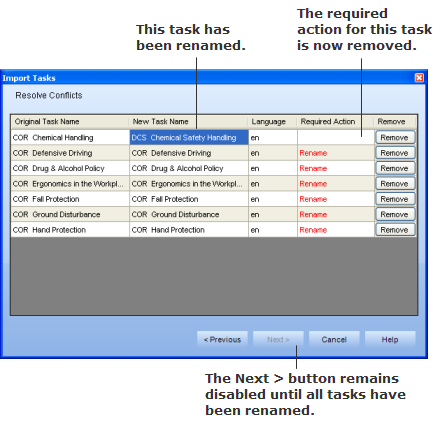
If you are copying existing tasks into a system, you will have to rename each task on the Resolve Conflicts page. Until all tasks are renamed, the Next > button will be disabled. A task can also be removed by clicking the Remove button. This will delete the task from your import. If you want to add it back, click on the Previous > button to return to the Select Tasks to Import page.
Note: If the system you exported your tasks from used multiple language, each task will show up in its own language, and, you will have to change the name of each task in its on language.
When all conflicts are resolved, click the Next > button. A confirmation dialog appears: "Would you like to import the selected files now?" To import the files, click Yes. (Clicking No will return you to the Resolve Conflicts page.)

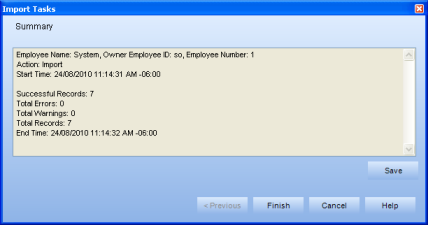
Once your import is complete, the Summary page appears. This page displays a summary of the tasks that were successfully imported and the total amount of errors and warnings—these are listed in detail. Click Save to save a copy of your summary. Click Finish to close the Summary page.
This completes your task import.
Additional Help:
Exporting Tasks (Step-by-step Instructions)
Importing Tasks (Step-by-step Instructions)
