
|
|
|
|
You can customize your Quick Access Bar any way you want. Every role has a Quick Access Bar. Learner and management roles have different default icons and different icons to add and remove, but customizing the bar works the same.
To customize your Quick Access Bar, use the Toolbar Editor, which you access by clicking on the arrow to the right of the Quick Access Bar and selecting Customize Personal Toolbar:
The Toolbar Editor dialog then appears, which allows you to customize your Quick Access Bar:
click image to enlarge - double-click to resize
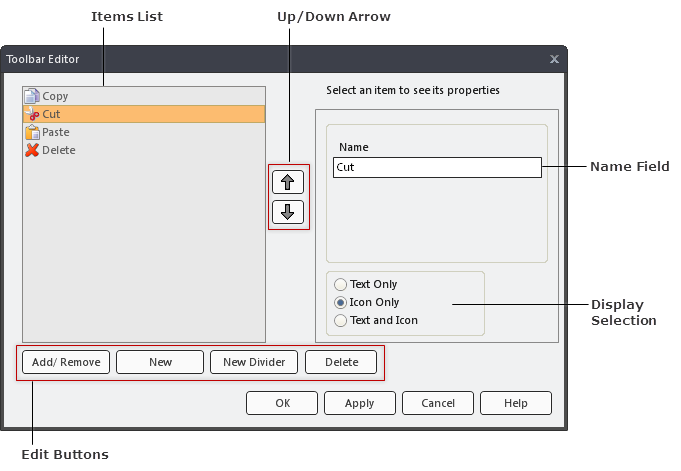
Items List - Displays the list of customizable item to appear in your Quick Access Bar. Certain items will not appear here, as they are a permanent part of the Quick Access Bar and cannot be removed.
Edit Buttons:
Add/Remove - Opens the Select Toolbar Items dialog, which allows you to select or deselect items to show in your Quick Access Bar.
New - Creates a custom item that leads to a file path or URL.
New Divider - Inserts a divider (a vertical line) that helps categorizing and organizing your items.
Delete - Deletes the selected item from your Quick Access Bar.
Up/Down Arrow - Changes the order of your items in the Quick Access Bar.
Name - Allows you to enter a custom name for the selected item.
Display Selection - Indicates how your items will appear in the Quick Access Bar: Text Only, Icon Only or Text and Icon Only.
To Add or Remove items to your Quick Access Bar:
To move the Quick Access Bar below or above the Ribbon:
Additional Help: