
|
|
|
|
No matter what your role is in TRACCESS (Learner, Supervisor, Operational Administrator, etc.), the interface is generally the same. Your role simply changes the functions and options you have access to. The main parts of the TRACCESS interface that you need to know are explained in the screenshots below.
Depending how your system is set up, when you first log into TRACCESS, you may first see the TRACCESS Dashboard or the TRACCESS Home. Whether you are looking at the Dashboard or the Home view, you will always see the Quick Access Bar and the Ribbon. Below you can see both the Dashboard View and the Home view.
Dashboard View:
click image to enlarge - double-click to resize
Home View:
When you are looking at the TRACCESS Home interface, there are several main sections in addition to the Quick Access Bar and the Ribbon, which includes the managers, the Properties section, and the context view.
click image to enlarge - double-click to resize
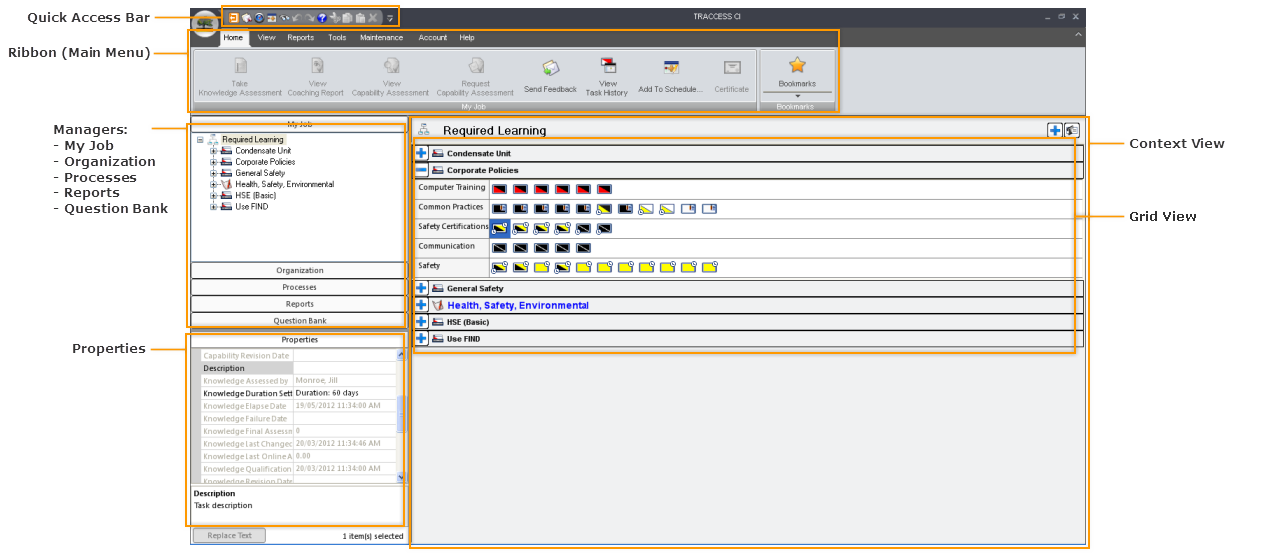
Quick Access Bar - A customizable bar made up of icons that allow you to quickly access commonly-used functions
Ribbon (Main Menu) - The Ribbon is where you access TRACCESS functions, which are grouped under tabs and displayed as icon-based buttons. As you select different items in TRACCESS, the Ribbon displays the item's relevant functions.
Managers - There are several different managers that encompass the different parts of the TRACCESS system: My Job, Organization, Processes, Reports, and Question Bank. You will only see the Managers that are relevant to your role.
Properties - The Properties section shows you details about a selected items. It may also allows you, depending on your role, to edit the item's details.
Context View - When you select items in the managers, the context view displays its relevant content.
Splitter - Splitters allow you to resize the different sections of TRACCESS to your liking.
|
|
|
|