|
|
|
|
The Events feature allows management roles to run functions like reports or emails, called "responses," at particular times and dates. It is the same as running these functions immediately, except that Events allows you to run more than one response sequentially at scheduled times. A new event is created by using the Event Creation Wizard.
There are two types of events:
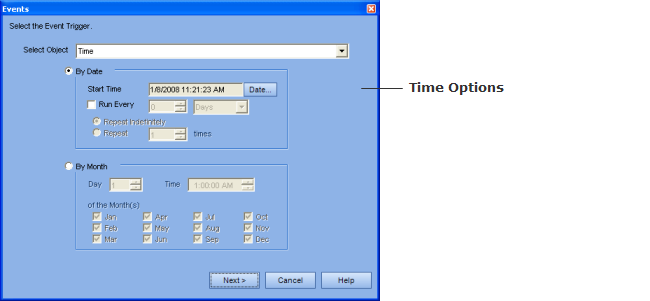
Time - A timed event is generated at a particular date and time. For example, a Reporter may want to run a report every Monday at 7 a.m. The Reporter would not have to remember to carry out this functionality; it would automatically run at the time set in the Event manager.
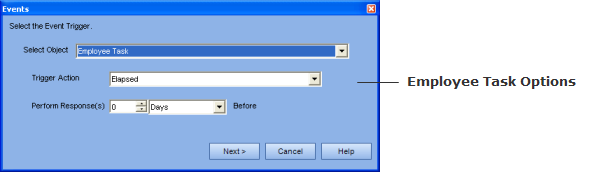
Employee Task - An Employee Task event is dependent on status changes to act as the trigger for the event to run. For example, an event could be configured to send an email to an employee a set number of days prior to a task elapsing. This would provide a reminder to the Learner to access the Competency Intelligence system, review required learning, and requalify on a task about to elapse, changing the status to complete.
There are five types of Responses:
Message - Sends an email to the selected recipients.
Report - Runs a report. Selecting a report as an event response requires an existing report template.
Archive Employees - Stores personal data of selected employees.
Import Employees - Enters employees into the system through an external file.
Import Learning Records - Enters employees' learning records into the system through an external file.
Note: The responses you have access to depends on your role and permission sets.
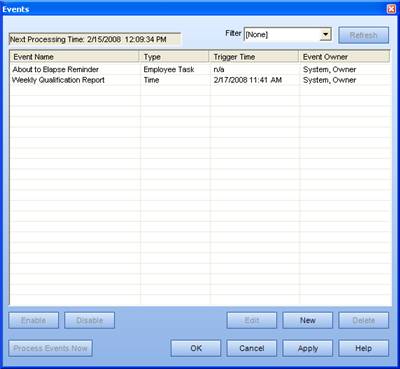
Events are accessed by selecting Tools > Events. The Events dialog appears. From here you can monitor, edit, create, and process events. The functions of this dialog are explained below.
Enable - Enables the event.
Diable - Disables the event.
Edit - Launches the Events Creation Wizard to edit an existing event.
New - Launches the Events Creation Wizard to create a new event.
Delete - Deletes an event.
Process Events Now - Checks if any events are ready to be processed. (This button works as an override, as this is done automatically.)
Filter - Changes what events you are viewing: Time, Employee Task, Owned by Me, or Owned by Others.
Refresh - Refreshes the information in this dialog.
Event Name - Displays the name of the event. If the name was not edited in the Events Creation Wizard, the default name is displayed. It is recommended that you give all your events unique names.
Type - Displays the type of event—either Time or Employee Task.
Trigger Time - Displays the time the event will run.
Event Owner - Displays the name of the person who created the event.
When you click the New button, the Events Creation Wizard is launched, and there are a number of criteria pages to complete.
On this page you select the event trigger, either Time or Employee Task, from the dropdown menu. For Time, you can set the trigger by date or month. For Employee Task, you must select the Trigger Action (this is the action that will trigger the event to be processed).
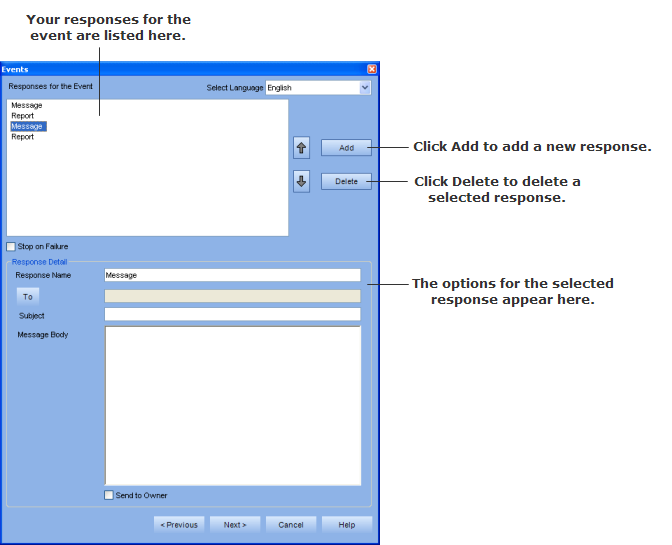
This is the page where you add responses to your event. If your competency intelligence system has multiple languages, first select a language from the Select Language dropdown menu (this menu will not appear if there is only one language in the system). Click the Add button to add a response. The Responses dialog appears, and there are five responses to choose from: Message, Report, Archive Employees, Import Employees, and Import Learning Records. After you select a response and click OK, it is added to the responses box. You can add multiple responses, then order them by clicking on the response name and using the up or down arrows. When you click on a response name, a number of options will appear below—each response will have unique options.
On this page, you can enter a new Event Name and Description (optional). It is recommended that you change the Event Name to something more specific from the default ("New Event"), especially when creating more than one event.
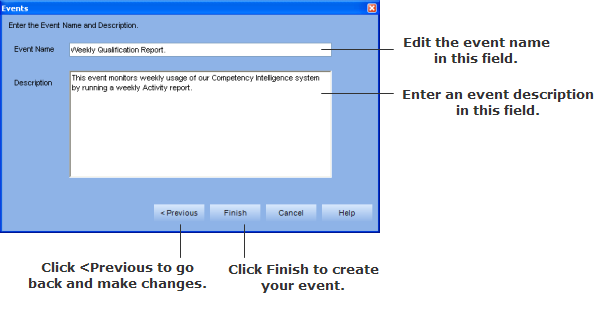
Once you have completed this page, you can click the < Previous button to go back and make changes, or click the Finish button to create your event, which appears on the Events dialog page.
Additional Help:
|
|
|
|
|