|
|
|
|
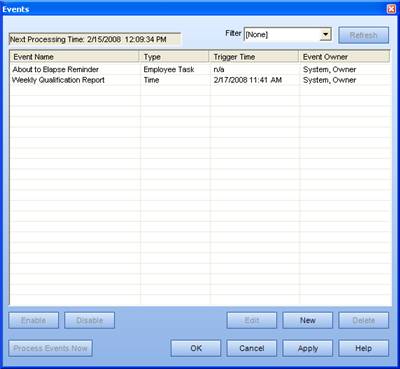
The Events dialog appears. ![]()
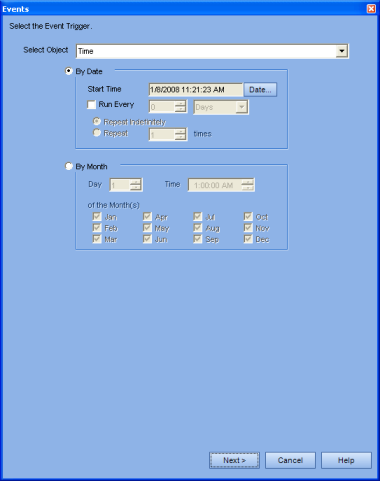
The Events Wizard, Select the Event Trigger page appears. ![]()
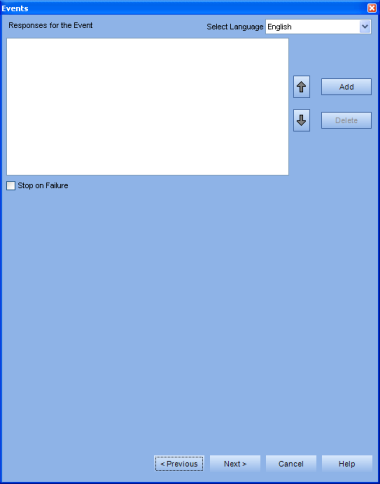
The Events Wizard, Select Responses for the Event dialog appears. ![]()
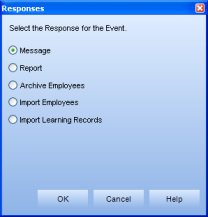
The Responses dialog appears. ![]()
Message:
To send an email message, click the To button.
The Select Recipients dialog appears. ![]()
Select the Organization Units or individual employees, to whom you wish to send the message.
Click OK to return to the Event Response dialog.
Enter the subject and body of the message in their corresponding edit boxes.
Select the Send to Owner checkbox to send a copy of the message to yourself.
Report:
To run a report, you must select a previously-created report template listed under its corresponding report type. If not, click on one of the report types listed below* for steps on creating a report template.
Once you have selected your report template, enter a name for the report in the Title edit box.
(Optional) Enter a description and/or subtitle for the report in the corresponding edit boxes.
Choose a layout from the dropdown menu.
Select the Send Completion Message to Event Owner checkbox to have a completion message sent to your inbox.
Click the To, CC, and/or the BCC button to send the completion message to people other than the event owner. A Select Recipients dialog appears.
*For steps on creating the individual report templates, click on the report type:
Archive Employees:
To archive employees, choose a File from the dropdown menu.
Choose the File Delimiter from the dropdown menu: comma or tab. This must match the format of your chosen file.
Select from the list of properties in the Match Properties box.
Check the Send Completion Message box to send a completion message to yourself.
Import Employees or Import Learning Records:
To complete an Import of Employees or Import of Learning Records, choose an Import File from the dropdown menu.
Choose the File Delimiter from the downdown menu: comma or tab.
Select the Date Pattern and Time offset from GMT.
Check the Send Completion Message box to send a completion message to yourself.
(For Import Employees only) Check or uncheck the list of options: Allow Employees to be added to the system, Allow Update Employee Properties, and Allow Org. Units to be created.
Select from the list in the Match Properties box.
If you need extra help with either of these type of responses, visit the Employee or Learning Records help pages for more detailed step-by-step instructions.
Please Note: Creating an event for the Import of Employees or Learning Records would only be done under particular circumstances. For example, if using another system that also contains employee and/or learning record information to synchronize an import of this information with the other system. The other system may be scheduled to export information to a particular directory on Friday nights, and an event could be created to import this information into your Competency Intelligence system on Saturday mornings.
Also note: There is one significant difference between the Import procedures that you carry out immediately and those scheduled through the Event Manager. When the import of learning records or employees is done immediately (through the Tools > Import option), one of the steps is to browse to the import file location. When the import is scheduled through an event, the file location must be indicated in the EngineConfig.xml file, and the file name is selected from a dropdown menu. This is because the event is likely scheduled during a time when the TRACCESS Client program is not actually running, and the event engine must know where to go to access the file. The setting in the EngineConfig.xml that must be entered is called ImportEventSourceDirectory.
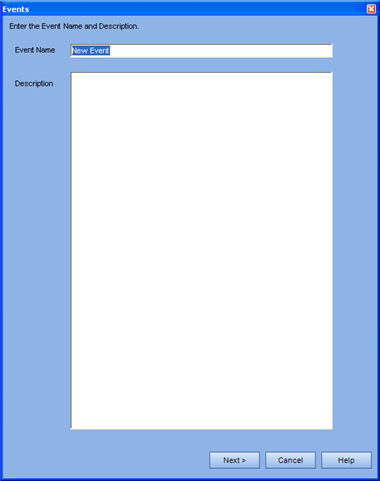
The Events Wizard, Name & Description page. ![]()
The new event appears in the Events dialog.
|
|
|
|
|