
|
|
|
|
Importing Learning Records can either be completed immediately or set up as a Timed Event. If you are accessing this procedure from the Event procedure, you have likely already configured your import spreadsheet. If this is the case, proceed to step 2 of Import Learning Records procedure below. If you have not configured your import information, start at the beginning.
Please note: If the Provide Explicit Digital Signature function has been enabled and the import function is being completed by an Operational Administrator, the last step after clicking OK will be followed by a Signoff dialog. This dialog requires that the Operational Administrator provides their employee ID and password to complete the procedure.
Click here to access a CSV file containing the relevant Import Learning Records fields. The File Download dialog appears.
Click Save. The Save As dialog appears.
Please note: Do NOT click Open. If you do, the file will open in the Help window, with no way to save any changes you may wish to make.
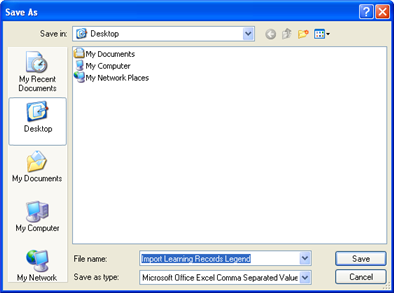
Navigate to a desired location.
(optional) Enter a new name for the import learning records file.
Click OK. The Download Complete dialog appears.
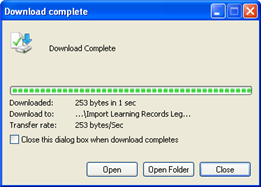
Click Open. The CSV file opens in Microsoft Excel.
The file must contain 15 columns. If you delete columns, the import will not succeed. If you add columns, the import will not succeed.
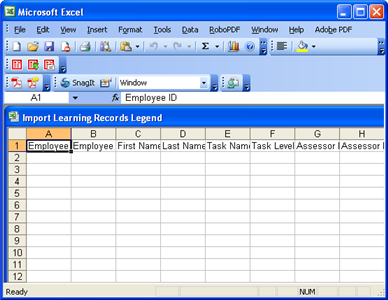
Highlight the columns A through O on the Microsoft Excel file.
Place your cursor at the border between O and P.
Double-click to make the columns the width of the column names.
Enter the information under the corresponding columns in the Excel spreadsheet.
For a more detailed description of each of the columns, see Import Learning Records Legend.
The information for one Employee on one Task occupies one row of the spreadsheet. If both Knowledge and Capability components were completed by the same person on the same Task, this information can be entered on the same row. Otherwise, each new Employee and new Task will require a new row.
Select File/ Save As from the main menu.
The Save As dialog appears.
Navigate to an appropriate location.
In the Save as type field, select Unicode text.
Enter a file name, and click Save.
Select Maintenance > Batch Processing > Import Learning Records from the main menu. The Import Learning Records dialog appears.
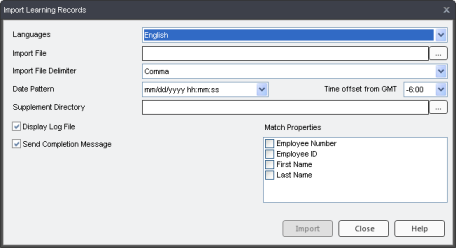
Select a language to import the information from on the Languages dropdown menu.
Click ![]() next to the Import File field.
next to the Import File field.
A standard Open dialog appears.
Navigate to the import file, select it, and click Open.
The file name appears in the Import File field.
Select the file delimiter, Comma or Tab, from the Import File Delimiter dropdown menu. (This must match the format used in your import file.)
Select the Date Pattern that was used in the Import file.
You can choose from dd/mm/yyyy, or mm/dd/yyyy, or yyyy/mm/dd. Microsoft Excel often reformats your dates after entering them into their respective fields. Verify with your import file that you have the correct pattern selected.
Please Note: The main reason for this field is to reconcile dates that could either be dd/mm/yyyy or mm/dd/yyyy. For example, 05/12/2004 could represent May 12 or December 5. Not selecting the appropriate date format may still import your records properly; however, it is advised to check that the formats match, just in case.
Select the Time offset from GMT from the dropdown menu.
(Optional) Click the ellipsis button ![]() next to the Supplement Directory field. A standard Browse for Folder dialog appears.
next to the Supplement Directory field. A standard Browse for Folder dialog appears.
Choose a folder that contains the file(s) indicated in the Attachment column in the CSV file. For more info, see Import Learning Records Legend: Attachment.
Click OK.
Choose from the options listed on the left:
Display Log File - Prompts a dialog to appear displaying information about the import after the Import button is clicked.
Send Completion Message - Sends a completion message and a copy of the log file to your email, once the import is complete.
Select the properties you wish to match with the current database information in the Match Properties box.
Click Import. One of two dialogs can appear:
If you selected the Display Log File option, the View Import Log appears. You can copy & paste this information into another document, or if you selected the Send Completion Message option, this information is sent to your email. This log indicates how many records were successfully imported and the total amount of errors, warnings, and records. For more info, visit View Import Log.
Click Close.
-or-
If your did not select the Display Log File option, a dialog will appear indicating whether or not your import was successful.
Click OK.
Note: If you selected the Send Completion Message only, you will see receive the log file information in your email.
Your import is now complete.
|
|
|
|