|
|
|
|
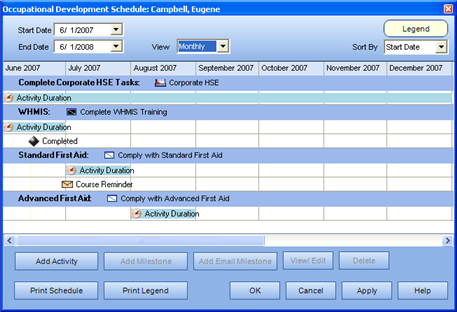
The Occupational Development Schedule for the Learner appears. ![]()
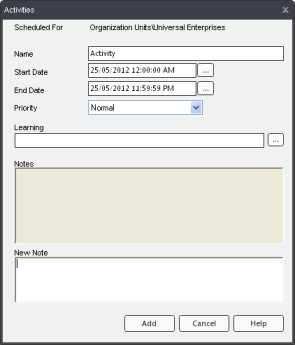
The Activities dialog appears. ![]()
If you do not specify a date, the Activity will default to the current date.
You may select from Low, Normal or High. The default value is Normal.
The Select Learning Linked to Activity dialog appears. ![]()
Please Note: The only object type that you are not able to link to is a Sub Process.
The new Activity will appear in the Occupational Development Schedule.
The Activity name will change to blue font, and the entire bar will be outlined in black line.
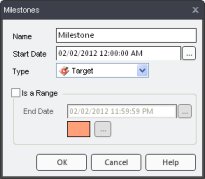
The Milestones dialog appears. ![]()
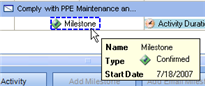
If you do not change the name, it will remain Milestone. If you select an icon that indicates a particular state (i.e., Arrange By, Completed, Confirmed, Deadline, Scheduled, Target), these words will be reflected when you mouse over the milestone. ![]()
The states of Arrange By, Completed, Confirmed, Deadline, Scheduled and Target have already been included. If there is a particular state that you would like to add, Miscellaneous 1 through 14 are available. Your System Owner can use the Export/ Import Translations function to change the name of one of the Miscellaneous states to something more applicable.
If the Milestone is a date range, check the corresponding checkbox, and indicate the End Date. Click ![]() next to the color square to select another color to represent the date range.
next to the color square to select another color to represent the date range.
If you do not specify a date, the milestone will default to the current date.
The new Milestone will appear in the Occupational Development Schedule.
The Activity name will change to blue font, and the entire bar will be outlined in black line.
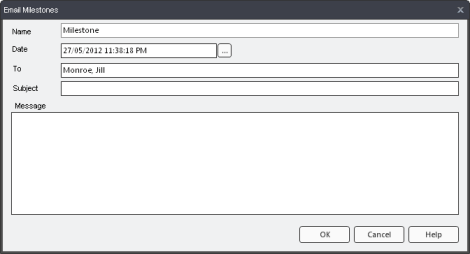
The Email Milestones dialog appears. ![]()
If you do not change the name, it will remain Milestone, however it will be distinguishable from the other Milestones in that it is represented by an envelope icon.
By default, the To field is populated with your name. In order for this functionality to work properly, your employee account had to be configured to include your email address. To test this, you may wish to create an email milestone - dated today - and send yourself a test message. If this message does not arrive, contact your supervisor.
An email milestone can serve as a reminder of an upcoming date.
The new Email Milestone will appear in the Occupational Development Schedule.
|
|
|
|