|
|
|
|
A new Course resource appears in edit mode, represented by the ![]() icon.
icon.
Providing Knowledge and/ or Providing Capability means that if these are set to Yes, and the Course Mark is obtained, the component(s) are considered complete (and will turn black).
A new URL resource appears in edit mode, represented by the ![]() icon.
icon.
A new TRACCable resource appears in edit mode, represented by the ![]() icon.
icon.
For example: http://<your domain name>/q4/session.dll
If you do not wish to re-enter this location every time you create a Resource Assessment, you can set the session.dll as a default value using the Tools/ Object Definitions from the main menu.
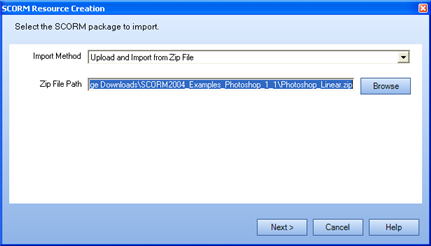
The SCORM Resource Creation dialog appears. ![]()
Upload and Import from Zip File
If a directory already exists for the SCORM zip package, a dialog appears with two options:
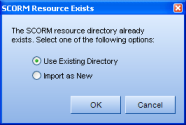
Use Existing Directory: Choose this option to use the existing directory
Import as New: Choose this option to create a new directory.
If no directory exists, the SCORM Resource Creation dialog appears (Step 6).
-or-
Import Existing Resource on Web Server
Click the ellipsis (...) button. A dialog box appears:
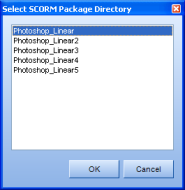
Choose one of the existing directories and click OK. If there are no directories, click Cancel and choose to Upload and Import from Zip File instead.
The second SCORM Resource Creation dialog appears. ![]()
The Properties pane in the Process Manager will display both the original SCORM name and the name you choose here.
Providing Knowledge and/ or Providing Capability means that if these are set to Yes, and the SCORM Completion Status is Complete, the component(s) are considered complete (and will turn black).
Note: The packaging and breaking up of SCORM modules is dependent entirely on the SCORM module.
A new TRACCable SCORM resource appears in edit mode represented by the ![]() icon.
icon.
When the Learner views My Job, the Resources are displayed under the Category/ Subcategory headings in the Task context view. If no Categories/ Subcategories are assigned to the Resources, the resources appear in a flat list for the Learner.
To add Resource Categories/ Sub Categories to the system, a System Owner can access the Tools/ System Options/ Task tab/ Resource Categories and Sub Categories buttons.
|
|
|
|
|