|
|
|
|
Customizing News & Links by Organization Unit
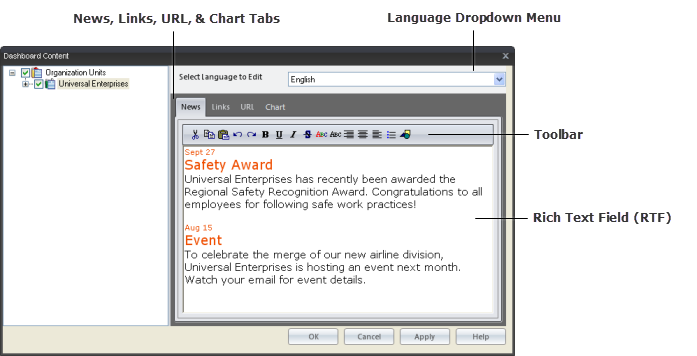
The Dashboard Content dialog allows you to configure the News, Links, URL, and chart content displayed on the TRACCESS Dashboard. These three panels act as a company “bulletin board”—a way of providing news, relevant links, web content, and vital chart information to your employees via their Competency Intelligence application. A System Owner, or Operational Administrator with permissions, can configure the Dashboard settings.
To access the Dashboard Content editor, select Tools > Dashboard Content. A dialog box appears, which allows you to edit the News, Links, and URL Dashboard panels, as well as add/edit charts.
How these items are laid-out and whether they appear on the Dashboard is set in the Dashboard Layout editor. If you want your Employees to see these panels after logging in, the Dashboard must be set as the Start Page: select Tools > System Options > Session tab.
The right pane of the Dashboard Content dialog consists of four tabs: News, Links, URL, and Chart. The News and Links tabs consist of a Rich Text Field (RTF), used to edit your News and Links; the URL tab allows you to enter a web link, and the Chart tab allows you to display charts on Learner Supervisor Dashboards. The left pane allows you to apply unique News, Links, URLs, and Charts to different Org Units.
Note: In the left pane tree, management roles only see and are able to edit the Org Units they've been assigned.
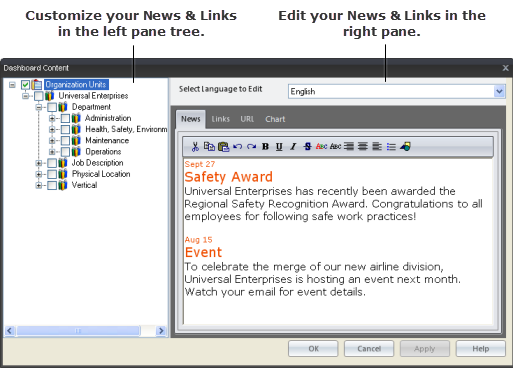
The News & Links are edited through the right pane in the News Editor dialog box. To edit your News & Links, first select an Org Unit from the left-pane tree and click on the checkbox to enable its News & Links. Next, select your language from the dropdown menu, and then click on the “News” or “Links” tab to determine which section you are editing. You can toggle between these tabs and click between multiple Org Units without losing any data. Enter your text directly into the Rich Text Field (RTF) or copy and paste the content from an external editor, such as Microsoft Word. You can then format your content or insert an image by using the toolbar. Click "Apply" or "OK" to save your settings.
Choose the language you're editing your News & Links in with the language dropdown menu.

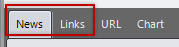
Toggle between editing your News & Links with these tabs. Both the Rich Text Fields work in the same way, and you can click between these tabs without losing your data or changes.
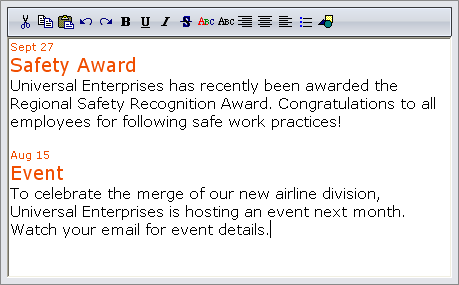
Enter your News & Links text directly into the Rich Text Field (RTF), then use the toolbar to format your text or to insert a picture. Alternatively, you can use an external editor, such as Microsoft Word, then copy and paste your content into the RTF. For a detailed description of the toolbar icons and tips on using the RTF, visit the Interpret RTF page.
A webpage can be displayed on the TRACCESS Dashboard. To incorporate a URL, first select an Org Unit from the left pane tree and click on the checkbox to enable its URL. Next, select your language from the dropdown menu, and then click on the "URL" tab. In the description field, enter a description or the title of the website. In the URL field, enter the webpage address such as www.Microsoft.com. Click the "Preview" button to view the webpage in the window below. Click "Apply" or "OK" to save your settings.
Note: If an Employee belongs to more than one Org Unit that has a URL, each URL will be displayed in a tabbed format in the same panel on the Dashboard.
As a System Owner or an Operational Administrator with permissions, you can add charts to Learner and Supervisor Dashboards. This is useful when you want your employees to see particular data as soon as they log in. These charts could be considered "permanent" charts, as employees will not be able to remove the chart(s) from their Dashboard; however, they can position them anywhere on their Dashboard, just like any other Dashboard item. You can change the data, which Org Units see which charts, and delete and create new charts at any time from the Dashboard Content dialog.
To create and manage Dashboard Content Charts, select Tools > Dashboard Content, and then click the Chart tab.
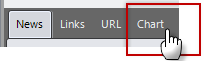
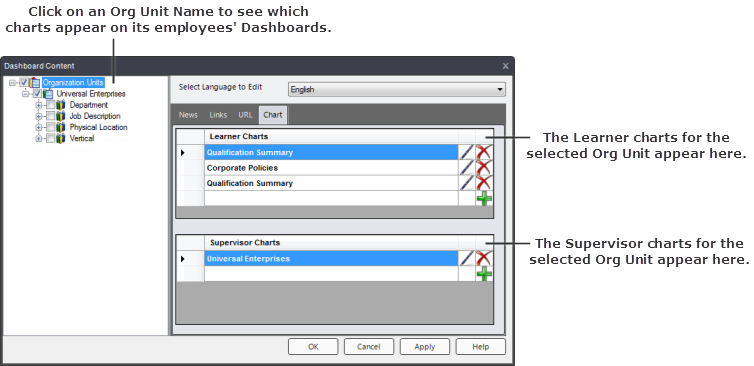
The Chart tab is made up of a Org Unit tree on the left that allows you to manage what charts certain Org Units see. When you click on an Org Unit name, the charts that appear on Learner and Supervisor Dashboards of those Org Units appear in the right pane under Learner Charts and Supervisor Charts, as shown in the image below:
Too add, edit, or delete a chart, first click on the Org Unit name in the left; this allows you to manage the charts for that particular Org Unit and all of its child Org Units.
Once you have selected an Org Unit, you can use the three buttons, as explained below, to manage your Learner and Supervisor charts:
 Add - Allows you to add a new Learner or Supervisor chart to the selected Org Unit with the 'Edit Chart Settings' Wizard. (This works very similarly as an employees adding charts to their own Dashboards.) The chart will appear on the Dashboards of all the employees that belong to that Org Unit and to its child Org Units.
 Edit - Allows you to edit an already existing chart with the 'Edit Chart Settings' Wizard.
 Delete - Deletes the chart from the list, and it will no longer appear on any Dashboard.
Under Learner Charts, the Qualification Summary is listed by default and assigned to all Org Units in the system. From here you can rename, edit, or delete this chart. You can also add additional Qualification Summary chart types; however, it is recommended that you give each one a unique name that reflect the learning it displays. Note: For the Qualification Summary to appear, "Charts" must be enabled in Dashboard Layout.
For step-by-step instructions, visit Adding Learner Charts to Dashboard Content.
Under Supervisor charts, no charts are listed by default.
For step-by-step instructions, visit Adding Supervisor Charts to Dashboard Content.
The information displayed in the News & Links sections can be customized by Org Unit. Employees belonging to multiple Org Units can see merged News and/or Links unique to the Org Units they belong to. The left pane of the News Editor dialog contains a tree, which works like a hierarchy. News & Links of parent Org Units are displayed to all the Employees belonging to the child Org Units; however, the News & Links for a parent Org Unit can be disabled and each child Org Unit’s News & Links can be individually customized.
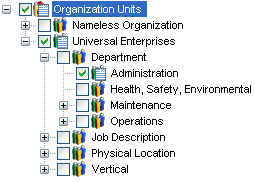
Note: The left pane tree in the image above shows the System Owner view, which includes the "Organization Units" root. An Operational Administrator, however, will only see (and be able to edit) their assigned Org Units. An example of the Operational Administrator view of the tree is shown in the image below.
![]()
Clicking on an Org Unit name in the tree will allow you to edit the News & Links for that particular Org Unit.
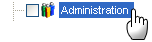
When you add News or Links for an Org Units, the look of the icon changes. This indicates that this Org Unit contains News or Links. The box beside the icon must be checked to enabled the News and/or Links for this Org Unit. Once enabled, the News and/or Links will be displayed for the Employees who belong to the Org Unit.
![]()
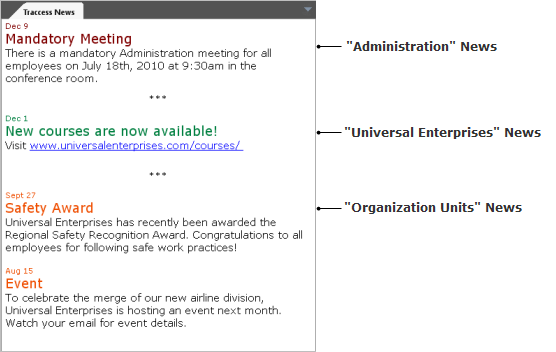
In the example below, the root and two Org Units are enabled, each with unique News content:
The "Organization Units" root (Edits News & Links for all Org Units in the system.)
The parent Org Unit “Universal Enterprises”
The child Org Unit “Administration”
The left pane tree shows these three Org Units enabled and with content:
Employees belonging to the "Administration" Org Unit will see merged News from the three selected Org Units. In the image below, each News announcement has been separated by asterisks. This could also be done with dotted lines, a title, or a small image such as a star.
Additional Help:
Interpret Rich Text Format Editor
Adding Dashboard Content Learner Charts
Adding Dashboard Content Supervisor Charts